Concrete steps take a beating over the years. Rain, snow, foot traffic, and changing temperatures can all leave behind cracks, chipped edges, or worn surfaces. If the damage is minor, you may be able to repair it yourself with the right materials and a little patience. Knowing how to fix concrete steps can improve both safety and appearance while helping prevent the damage from spreading.
That said, not every repair is a good DIY project. Some problems point to structural issues that patching won’t solve. This guide explains how to repair minor damage, keep your steps in good shape, and know when it’s time to call a professional.
What Do You Need Before Starting?
Before opening a bag of repair mortar, take a close look at the condition of the steps. Small cracks and chipped corners are usually repairable. Large cracks, loose steps, or noticeable movement often indicate a bigger problem.
Once you’ve determined the repair is appropriate, gather your materials before getting started.
You’ll typically need:
- Concrete repair mortar or patching compound
- Concrete bonding adhesive
- Hammer and cold chisel
- Wire brush
- Masonry trowel
- Putty knife
- Bucket for mixing
- Safety glasses
- Work gloves
- Broom
- Garden hose
The type of damage determines the repair method. Here’s a general guide.
Damage | DIY Repair? | Recommended Solution |
Hairline crack | Yes | Concrete crack filler |
Chipped corner | Yes | Repair mortar |
Surface flaking | Sometimes | Resurface or patch |
Loose concrete | Sometimes | Remove damaged material and rebuild |
Deep structural crack | No | Professional inspection |
Sunken or shifting steps | No | Replacement or reconstruction |
If you’re unsure whether the damage is cosmetic or structural, it’s worth having the steps evaluated before spending time on repairs.
Step-by-Step Guide
Step 1: Check the Condition of the Steps
Walk around the staircase and inspect every surface.
Look for:
- Loose concrete
- Deep cracks
- Broken corners
- Uneven steps
- Water collecting around the base
- Areas that sound hollow when tapped
Surface damage is usually repairable. Movement or settling usually isn’t.
Step 2: Remove Damaged Concrete
A repair is only as strong as the surface underneath it.
Use a hammer and cold chisel to remove loose or crumbling concrete until you reach solid material.
Then use a wire brush to remove any remaining dust or small particles.
Skipping this step is one of the main reasons repairs fail.
Step 3: Clean the Area
Repair products bond best to clean concrete.
Sweep away debris and rinse the damaged area with water to remove dust.
Some repair products require damp concrete before application, while others require a dry surface. Always follow the manufacturer’s instructions for the product you’re using.
Step 4: Apply Bonding Adhesive
If your repair product recommends a bonding agent, apply it before placing the repair mortar.
This creates a stronger connection between the old concrete and the new material.
Follow the recommended wait time before moving to the next step.
Step 5: Apply the Repair Material
Mix the repair mortar according to the manufacturer’s directions.
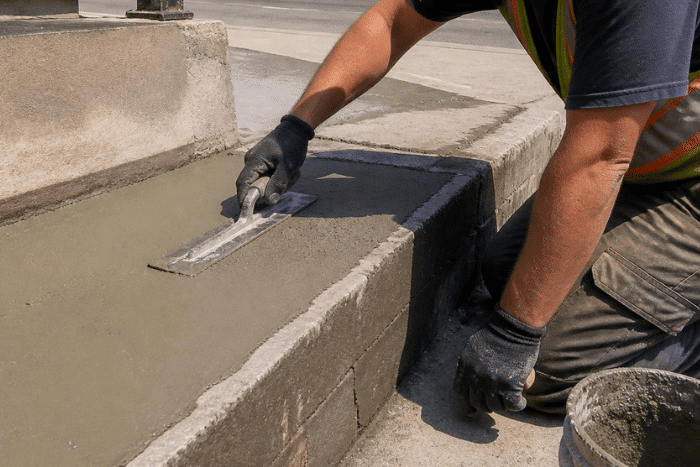
Press it firmly into the damaged area with a trowel, ensuring there are no air pockets.
If you’re trying to fix a concrete step with a missing corner or a deep chip, build the repair up gradually rather than applying a single thick layer all at once.
Shape the repair so it matches the surrounding concrete as closely as possible.
Step 6: Match the Existing Finish
Before the repair hardens, smooth or texture the surface so it blends with the rest of the steps.
If the original concrete has a broom finish, lightly drag a broom across the repair to match the texture.
Matching the finish helps the repair look less noticeable while maintaining traction.
Step 7: Let the Repair Cure
Fresh repairs need time to gain strength.
Avoid walking on the steps until the repair material has cured according to the manufacturer’s recommendations.
If rain or freezing temperatures are expected, cover the repair to protect it while it cures.
Pro Tips to Properly Fix Concrete Steps
Small details often determine whether a repair lasts one season or several years.
Keep these tips in mind before you begin:
- Repair damage as soon as you notice it.
- Work during mild weather whenever possible.
- Don’t apply repair mortar to dirty or loose concrete.
- Follow the manufacturer’s mixing instructions carefully.
- Avoid using more water than recommended.
- Feather repair edges so they blend naturally into the existing surface.
If you’re making the same repair every year, the problem likely goes beyond the surface. Water infiltration, poor drainage, or settling may need to be addressed before another patch will hold.
Tips to Extend Concrete Steps’ Lifespan
Concrete steps require very little maintenance, but ignoring small issues can shorten their lifespan.
A few simple habits go a long way.
Maintenance Task | Recommended Timing | Why It Helps |
Sweep away dirt and leaves | Weekly | Prevents stains and moisture buildup |
Wash the steps | A few times each year | Removes dirt and road salt |
Check for cracks | Spring and fall | Catch damage before it spreads |
Apply concrete sealer | Every 2 to 4 years | Helps reduce water penetration |
Remove snow promptly | After each snowfall | Limits moisture exposure |
Fort Wayne winters can be especially hard on exterior concrete. Moisture that enters small cracks expands when it freezes, making those cracks larger over time. Repairing damage early and keeping water off the surface can make a noticeable difference.
When NOT to Rely on DIY Solutions
DIY repairs work well for chipped edges, small cracks, and minor surface damage.
They’re much less effective when the concrete itself is moving.
You should have the steps professionally evaluated if:
- The staircase has settled.
- Cracks continue growing after previous repairs.
- Multiple steps are separating.
- Large pieces of concrete have broken away.
- Water is washing out the soil beneath the steps.
In these situations, patching the surface only hides the symptoms. Unless the underlying issue is corrected, the damage will almost always return.
A professional can determine whether repairing cement steps is practical or whether replacement will provide a safer, longer-lasting result.
Get Long-Lasting Concrete Step Repairs from Crystal Creek Concrete
Learning how to fix concrete steps is helpful when you’re dealing with small cracks or chipped corners. With the right preparation and repair materials, many minor issues can be addressed before they become more expensive.
When the damage involves settling, structural cracks, or repeated repairs that don’t last, replacing the steps is often the better choice.
Crystal Creek Concrete helps homeowners throughout Fort Wayne repair and replace damaged concrete steps, walkways, patios, and driveways. If you’re unsure whether your steps can be repaired or need to be rebuilt, their team can evaluate the damage and recommend the option that makes the most sense for your home.